Hello folks! Hope you’re all enjoying the weather we’re having at the moment. I am very pleased to announce that my website is now up and running- hurrah! It’s taken me a while to get my head around WordPress again but it’s getting there; there’s a couple more tweaks here and there that I still need to do, but other than that it’s looking a lot more slick and better than before.
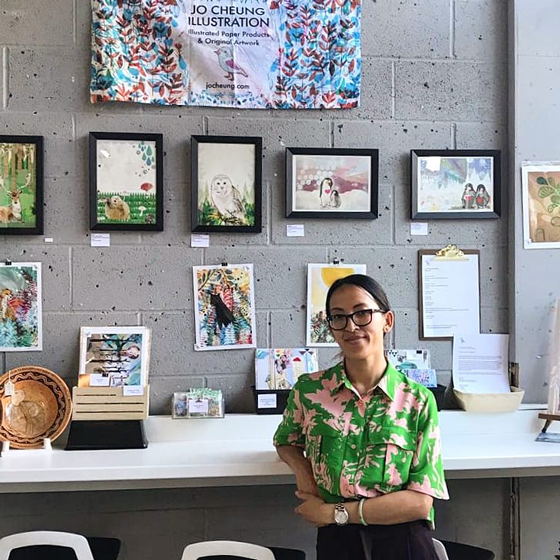
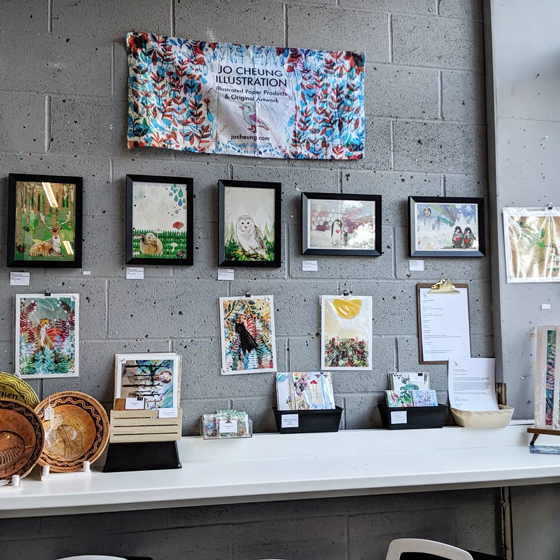
I’m also super excited say that my solo show at Scicluna Deli in Doncaster is now up and running from now until the end of the month. My dad, bless him, helped me to set up and we got there in the end. Albeit a total of two hours chatting away to Josie and Angie who works there.
I’ll be there again on Saturday 15th just to check things are a-okay and in the meantime if you happen to be around the area why not pop in and have a gander. There are cards, postcards, art prints and lots of other lovely things for sale.
Thanks for reading as always and enjoy the weekend!
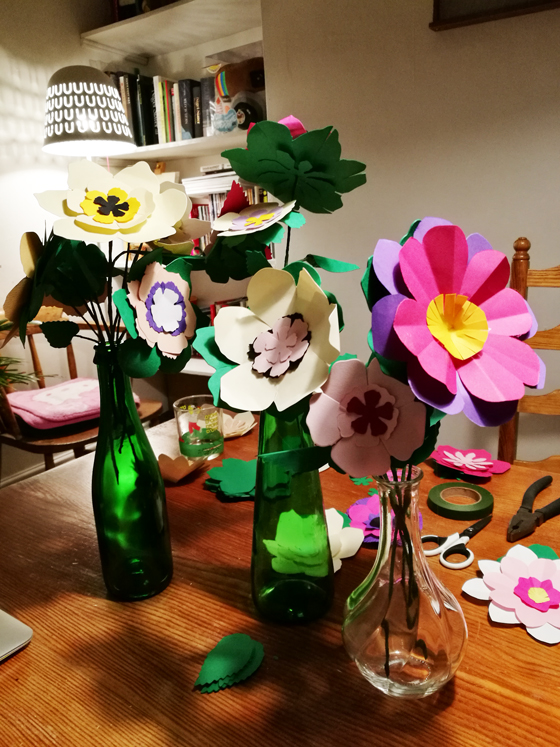
Hello lovely readers! This is going to be a very quick post about how to make paper flowers. I’ll be going through step-by-step on how to put together paper flowers for all your spesh occasions. There are loads of books and online tutorials on how to put together paper flowers (thank you Pinterest as always); I won’t go into detail about using different types of paper etc. as I feel that it’s up to you to go and have some fun and experiment with this part of the process.
I’ve been making paper flowers since the start of October as my plan for the wedding reception was to have a mixture of paper flowers on the tables and a BIIIIIGGGG flower installation hanging across the beams. I’m getting pretty adventurous here and I’m not sure if I’m jumping the gun, like, but I thought I’d make as many as I can from now until the wedding and see what happens really!
In my previous post I wrote on how to make paper flowers using a die-cutting machine and this post kind of follows on from that. For this next step you’ll already need some paper flowers ready so that you can make the stem for it and add any other details you want to it.
Alrighty, so let’s get making paper flowers folks!
What You’ll Need
Paper flowers and leaves at hand
Floral tape
Pliers
Floral wires (available from most craft shops)
Cutting mat
Glue gun and loads of glue sticks!
Depending on how high you want your flower I’d use one piece of wire per flower. If you want to make smaller ones then cut the piece of wire using pliers.
Wrap the wire using the floral tape from top to bottom, stretching it and twisting it as you go. Remember to press into the tape as you make your way down it. The easiest and fastest way is to literally spin the wire around the tape and that way you cover all of the wire.
If you want to add stems to it repeat steps one and two; to add different heights to the flower place the stems randomly or as naturally as possible.
Have cut out green leaves for the bottom of your flower and make a hole in the middle of it by pushing through the floral wire.
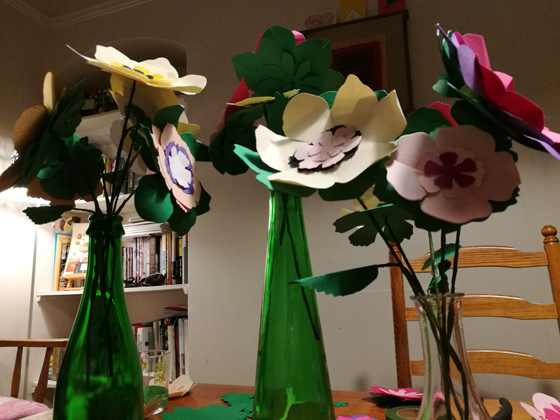
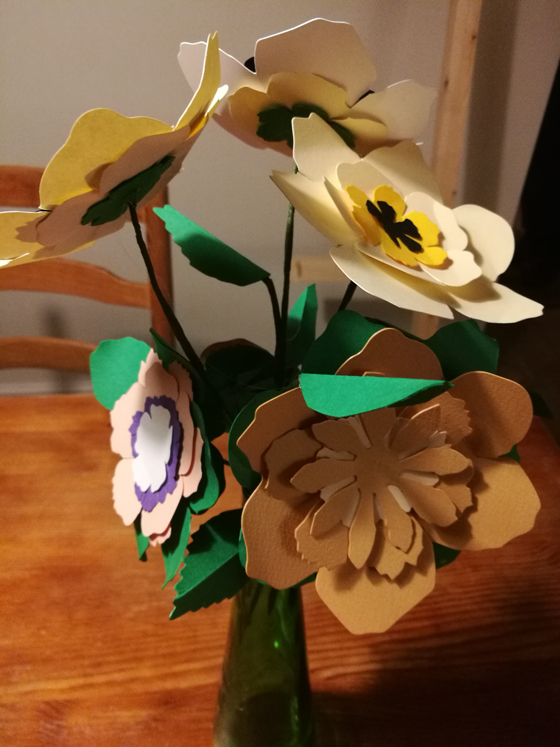
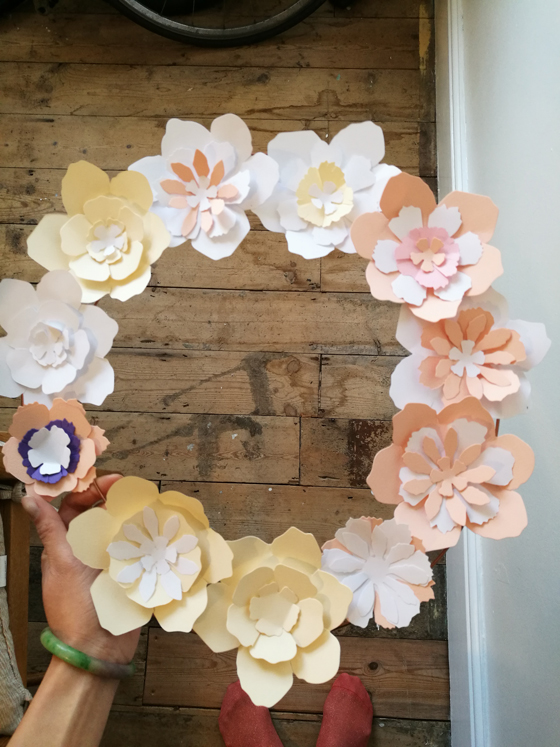
The next step is to assemble everything together. As you can see from the photos I’ve used two pieces of green leaves which holds the flowers to add texture to it.
Get your glue gun ready!
Glue together all the pieces together, pressing them together firmly as you go. For the last part of the green leaves (BEFORE you stick on your flower), bend the wire so that it secures and holds the green leaves.
Add more glue to the top part and press together your flower.
Keep going and add more leaves to your flower(s).
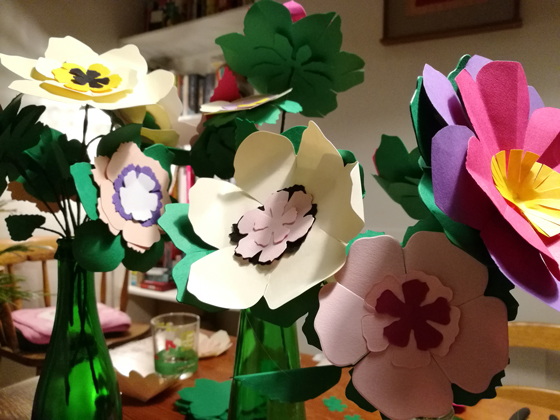
You can see from this photo that I’ve added green leaves to the bottom of the flower heads. This holds the wire and the flower head together (step 7 and 8).
I’ve found that using different shaped leaves and flowers can really make the whole thing stand out. There are kits online where you can easily assemble them together, however, this is so much fun and the fact that once you get into the rhythm of it, you can make a few in one go.
Like I said, there are lots of books on how to make different types of paper flowers (e.g. crepe paper flowers)- I’m pretty much going to stick with this style as it’s easier for me to make one big batch in one go. We are hoping to give them away at the end of the evening, which will be a rather lovely gift for our guests as we’re not doing wedding favours.
Get crafty folks and enjoy the rest of your weekend!
GOODBYE JANUARY! January sure did drag on for a while, right? Not sure if it was the shorter days and the lack of light but at some points in the month I was feeling up and down like a see-saw. Or even post-blue Christmas holiday feels certainly lingered on; seeing my friends and family over the Christmas period made me feel guilty for not being closer to them. I suppose it’s one of the downsides of being far apart from your folks, I mean, I can jump on the train and see them. But that means spending ‘X’ amount on train fares and only having a short amount of time to seeing everyone *sighs*.
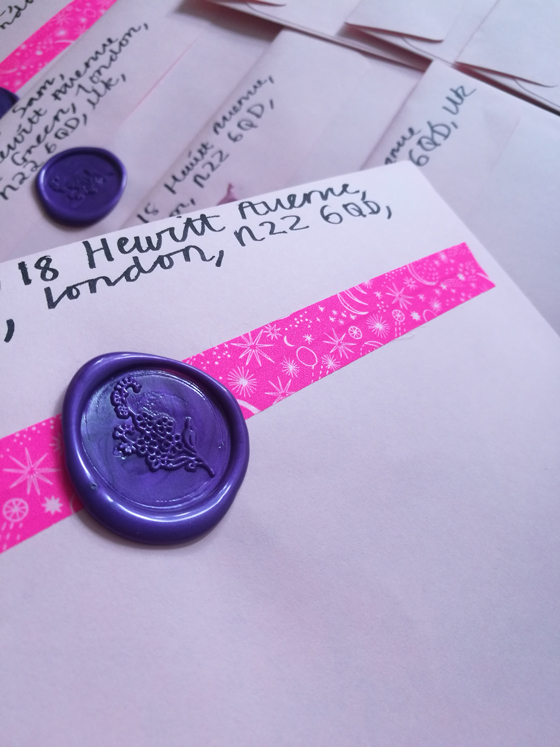
The wedding prep has been a rather nice distraction from all of this and I can say that although I haven’t done as much art as I’d like to, I’ve picked up paper craft pretty quickly and I love looking on Pinterest for inspiration and ideas. In this post I’ll be writing about wax seal stamps and how to make them for letters and envelopes. Firstly, I’m going to be honest and say that I’m not a pro at this; all of these skills I’ve picked up are from YouTube and Pinterest plus trial and error! I was never intending on making wax seals for our invites but Sam’s mum sent me some photos of some (probs Pinterest if I remember correctly) and since then I was completely hooked onto the idea of it- there’s something about wax seals that makes it so much more personal since no two seals are the same. You just need time, patience and an extra pair of hands if you’ve got lots of envelopes to seal!
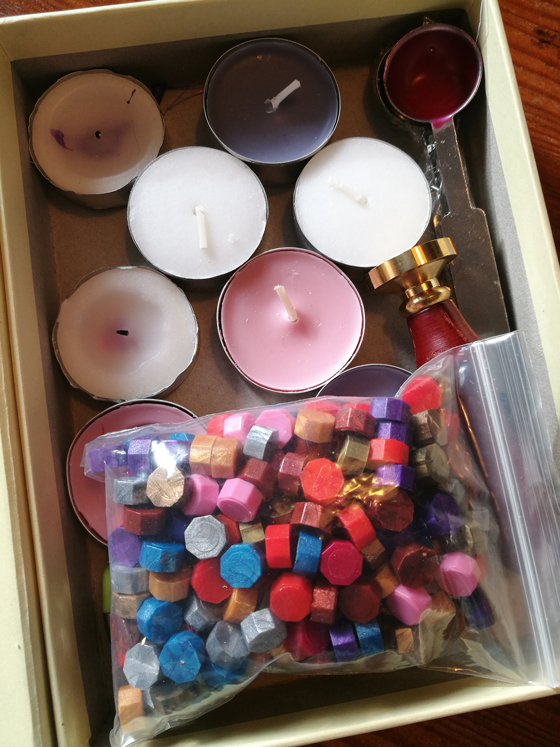
I bought my stamp from Etsy and it was reasonably priced for what you get: one stamp, three wax sticks, two tea lights and a metal spoon. There are loads of different designs online but if you want a custom one, then you’d need to contact the seller/maker with what you want. I wanted a simple flower design to match the invites: nothing fussy or over complicated.
What You’ll Need
One stamp
Tea lights (good quality ones though)
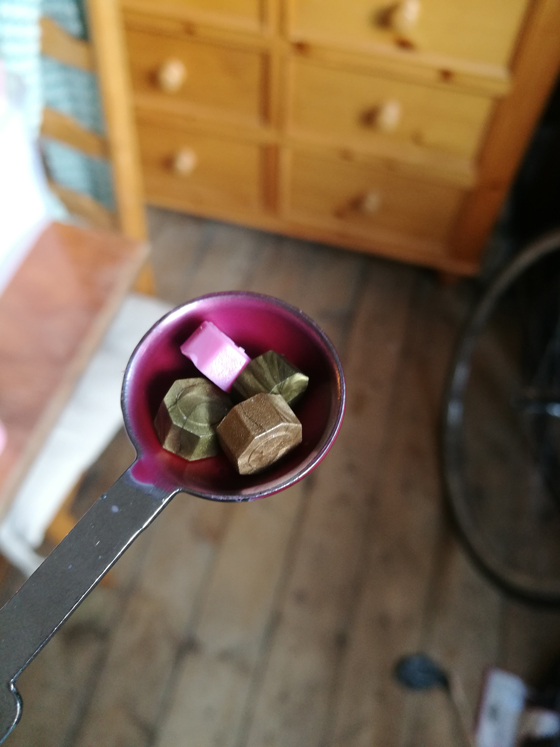
Wax sticks or pellets like the one in the photo
Spoon
Lighter
Damp cloth
A small dish so you prop your spoon whilst you’re melting the wax
I found that using the wax pellets were way more easier than using the wax sticks. The wax sticks can be quite fiddly to melt especially when you get towards the end of it and it turns into a stubby, little mess! I tried cutting it into pieces, which I failed as the stick was pretty hard to cut through. The main advantage of using the wax pellets is that you can mix different ones together much easily to get a marble-type effect. You can still do the same thing with wax sticks but it’s just a tad more faffing around with the wax sticks. Just take care when you’re doing this though especially if you’ve got children, cats, dogs etc. around your workspace- soz if I sound completely patronising but safety is always first though!!!!
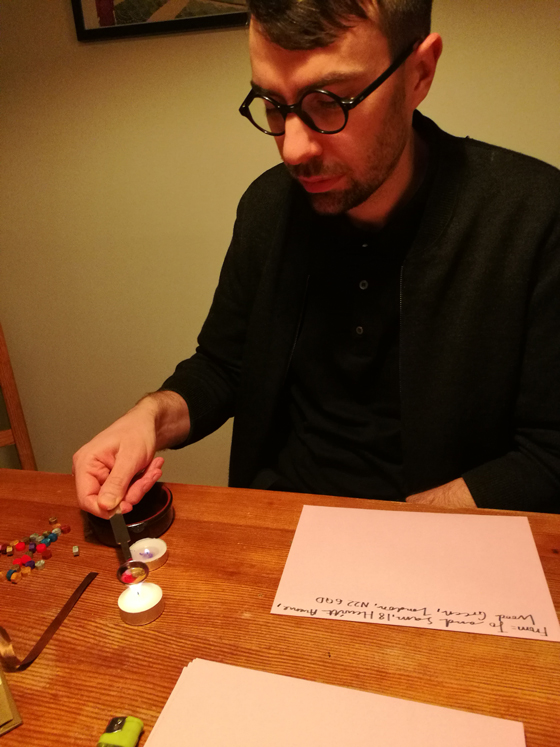
Heat up the metal spoon over the tea light for a couple of minutes and place the wax pellet into the spoon.
You’ll know when the wax is ready if you give it a bit of a swish. Don’t worry, the wax comes out pretty slowly as I thought that the wax would be super runny! Also, don’t fill it up too much otherwise the wax will seep out.
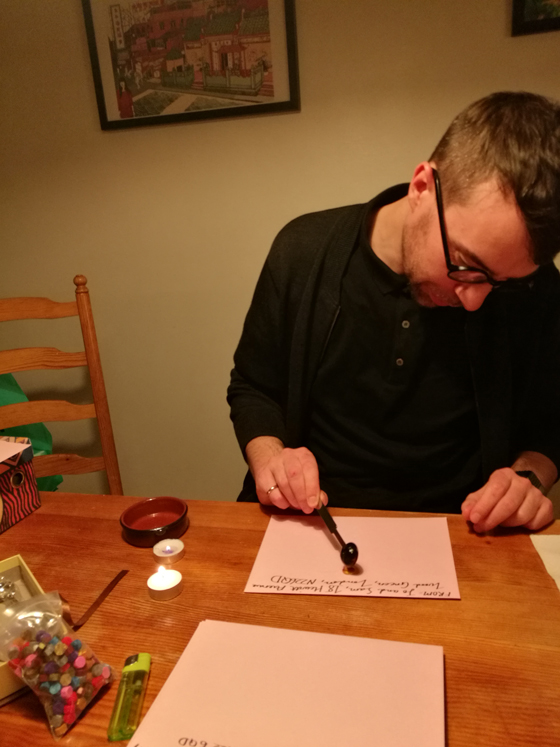
2. Once the wax is ready pour it into the centre of the envelope in a circular motion.
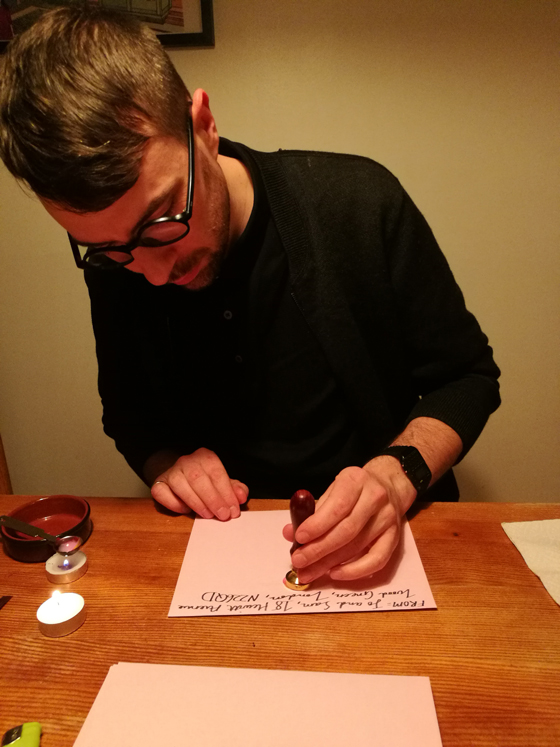
3. Now place the stamp over the wax for a couple of seconds, slight pressure to the stamp but not too much though.
4. Done! Keep going with different types of colour for a marble effect and remember to put the tea light out when you’ve finished. Give the spoon a wipe with a damp cloth to remove any residues.
You can play around with different colour waxes for different effects- the possibilities are limitless (depending on what your colour theme is).
That’s all for now and happy crafting everyone! I’d love to see what your seals look like and any tips/hints please do post them in the comments section.
This is not a sponsored post nor am I affiliated with any advertising/promotional deals.
Hello folks! I’m going to start a series of DIY guides for wedding-related craft projects. As you may know, Pinterest is such a wonderful source of inspiration and I’m forever looking at posts for ideas for our wedding. I started a board years ago and it’s been such a great tool for art and craft projects. However, sometimes I get way too carried away and go off on a tangent for several hours!
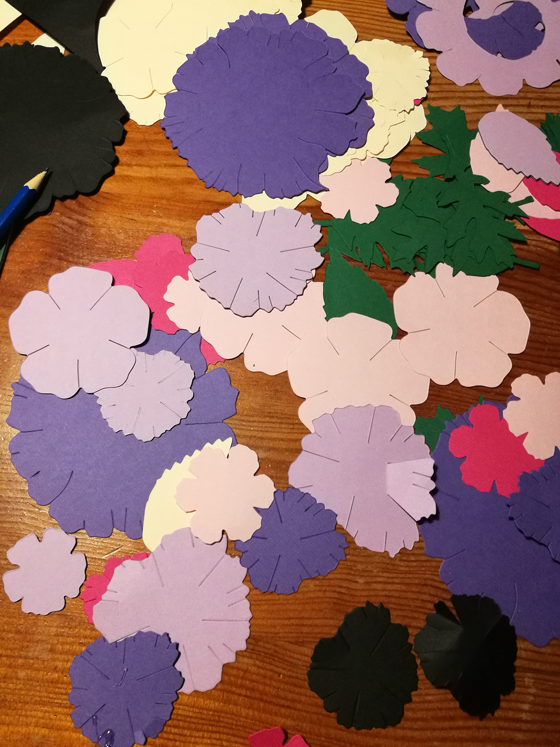
My main task for the wedding reception is that I wanted to create something quite opulent, flower-inspired since my invites are along that theme, so I’ve decided to make paper flowers as a start and from there use them to make a chandelier as well as garlands. I started off cutting out circles and then making them 3D shape so that they can sit nicely once they’re all bunched together. My only issue with this method is that it does takes ages and you need to have patience/music in the background to keep you going. I also found that it’s very difficult to get the flowers all looking the same, not like I wanted them to, but I was unable to to anything intricate due to the time factor.
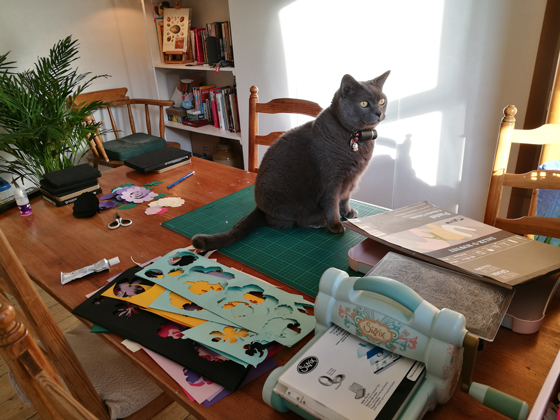
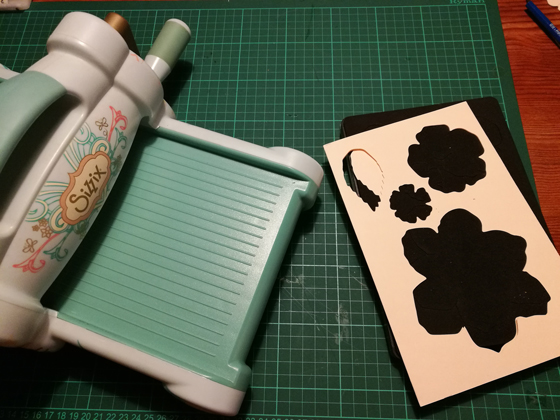
I came across a die-cutter thanks to my aunt, who has kindly let me borrow hers, and I’ve honestly not looked back since I’ve been using it! It’s saved me so much time and I’ve been churning loads of flowers out like a pro! I think there are numerous brands of die-cutters but I’ve been using one called the Sizzix. It’s pretty straight forward to use and so far I’ve not encountered any problems with it. There are loads of options of different dies too so I’ll buy a few more so that there’s variations in the types of flowers. For me, it feels really durable and the die cutter has some weight to it- so it feels super sturdy when you’re holding it.
What You’ll Need
Die-cutting machine (you can by them online or in craft shops)
Paper (lots of it!)
Pencil
Heavy-duty ruler
Scalpel or scissors
Cutting mat
Glue (I like to use super glue)
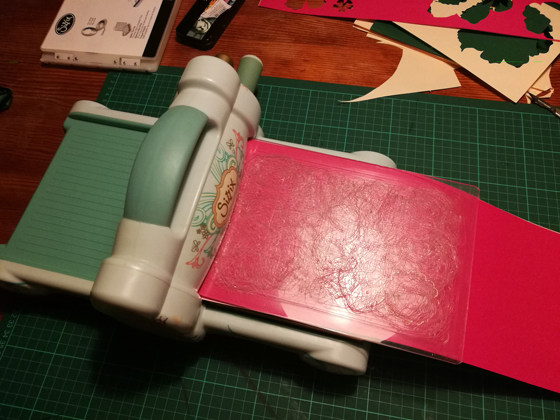
Prep your paper so that it sits nicely between the plastic board and the die. You’ll want to cut it so that it can fit through the die cutter- so I tend to measure up all my paper and cut them to the right size.
2. When your paper is sandwiched between the plastic boards and the die (the foam side facing upwards like in the photo above), you’ll want to leave at least a 1cm gap when you’re feeding it through. Gently push it through and start to turn the handle. At this point, you’ll be able to feel the rollers grip onto the plastic boards.
3. Done! Well almost. I usually keep going at this point, mixing up the papers until I have enough to keep me going.
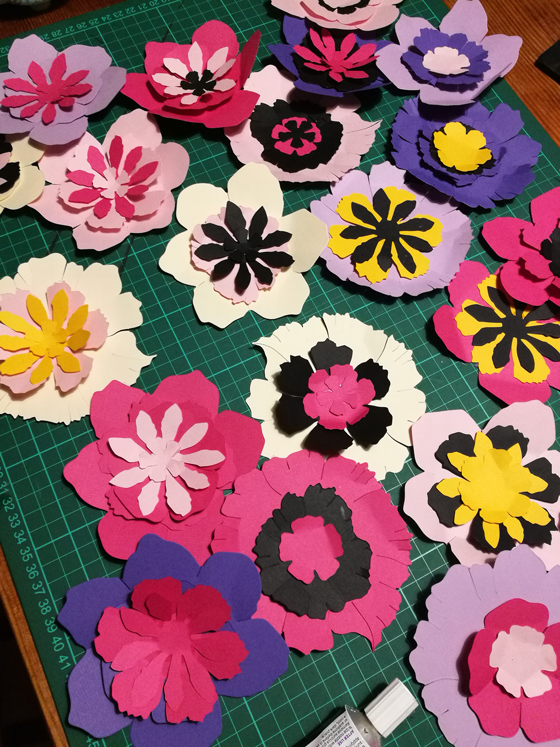
4. Once you’ve cut out all your layers you’ll want to start layering up the bits of paper. I fold the petals inwards so that they’re 3D-looking and using different types of paper/card will give you different effects.
Note: try using plain paper and washing it down with light water colours or spray paint to get different effects.
And that’s pretty much it. I’ve found that the more you try out different types of paper, the variations are limitless. There are lots of helpful online tutorials if you get stuck but personally once you start using it’s really so easy to use.
I hope I’ve inspired you to create your own paper flowers; even with or without the dit cutter you can still make simple paper flowers even it’s cutting out the petals and arranging them on a circular paper disc, continuing to layer them up as you go.
Happy New Year everyone (is it still too late to be saying it at this time of the month now?!). I hope you’ve all had a restful Christmas; even if it means doing nothing, just chilling, spending time with family, and eating loads of chocolate. I did all of that including more wedding-admin which never seems ending right now.
So in terms of wedding related things, what have we done so far? Bearing in mind it’s about seven months now and right now I’m feeling rather elated and slightly stress-y just because there’s so much to do.
I bought my wedding dress! YES it’s done! Am I going to reveal anything about my dress? Nope!
Thanks to Sam he’s made an online RSVP form for folks so it’ll making the process of collecting information much quicker.
Invites are printed and we’re currently in the middle of writing the rest of them up. Hopefully they’ll be done by the end of the weekend. (Separate blog post about the invites will be up once they’re all sent out).
Honeymoon to Japan is now booked and I’m currently freaking out about it. I bought a Lonely Planet guide a while back so now I’m book marking all the pages and there’s a long to-do list, the most important one is to eat our way around Japan. Bring on the noodles.
Dresses for the flower girls are done plus accessories. This was a bit of a tricky one as it’s actually quite hard to find formal wear for children. My mum and I went to loads of shops around Doncaster and in the end we had to go to further afield to Sheffield but I’m happy with the dresses and so are the girls.
Bridesmaids dresses are also off the list.
The order of the Tea Ceremony has been written up. Again, I’ll write up a separate blog post about the Tea Ceremony for those that aren’t familiar with it.
We’ve got our caterers sorted out, all we need to do is to finalise the furniture and tableware.
We’re currently finalising potential florists so this should be dine either this week or the following week at the latest.
My current project at the moment is making paper flowers, thanks to my aunt, she let me borrow her die-cutting machine and it’s saved me loads of time. If you don’t know what a die-cutting machine is there’ll be a how-to-guide in the next couple of days as I highly recommend getting your hands on one if you’re planning on making paper flowers for whatever project you are doing.
I’m going to leave it here as I need to go back and write out more invites. I’m really eager to show photos of them but unfortunately I can’t do that just yet.
In the meantime though hope you have a lovely January (bye January, you were cold and it’s still dark!). Take care of yourselves and have a great evening.