Blog

With the increasing awareness in mental health and mindfulness, I just wanted to share wit you all my personal experience as to why it’s important to look after your state of your mind and personal well-being.

I want to start off by saying this year has been a rather rocky start to the year. It’s not the wedding that’s stressing me out but people and social situations that’s still that’s freaking me out. I’m not going to go into too much details about the ins and outs of it, but you get the gist of it. Work has been increasing stressful lately so I feel as though I’m slipping back into my old ways and letting the small things in life take over me like I have no control whatsoever. My streams of thoughts are constantly adrift somewhere in the vast corners of my own mind where I’m still finding it very difficult to be able to relate to people. I’ve never been a ‘people’s person’ let’s put it that way (I mean, what does that even mean?!).

I’ve explored pretty much all options, like CBT for instance, and it’s great if you have the time and space to do it right in the moment. My day job as a teaching assistant can be very hectic at times so I don’t have the time and energy to able to use the CBT techniques as advised by my therapist. I’ve recently started to take propanolol, which is used for various other ailments, but in particularly for anxiety since it’s a beta blocker. Now, I’ve always been in two minds about using medication but there comes a point in your life whereby there are certain avenues you need to try out and only you know what’s best for yourself. I wasn’t trying to self-diagnose myself but I’ve across it on the web and thought I should give it a go to see if there’s any difference in the physical and metal side of things. This week has been extremely tough if I’ll be blatantly honest as it’s really affected my sleep, so consequently I’m like a zombie in the day time- not really paying attention to anyone or even remotely focused on certain things throughout the day.

I have read that it’s one of the most common side effects from it and, although it’s supposed to be short term, I slightly regret taking it as I love my sleep. My sleep is everything to me. I’m a regular sleeper- always on time- my sleep patterns is pretty spot on too. So the fact that my sleep has become so irregular all this week I actually want to cry. I really hope this doesn’t last that long and that it’s only temporary- otherwise I’m going to completely ditch and find something else.

I’m constantly reminding myself that everything will be ok. Things will slowly work out. It takes time, positive energy and copious amounts of chocolate. Life always throws you those bloody curve balls you’ve just got to go through.

It’s Friday. Thank goodness it’s Friday and that the week is over. I’ll see how the weekend goes with the propanolol. I just want more sleep right now!

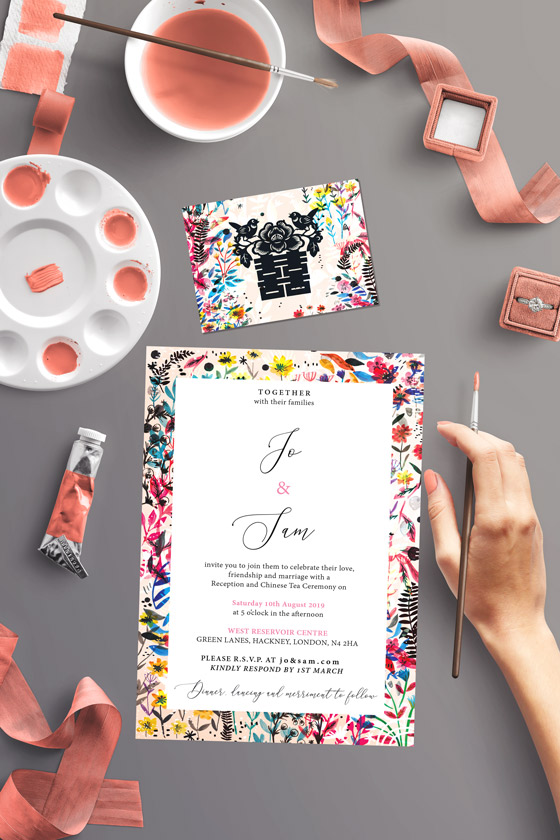
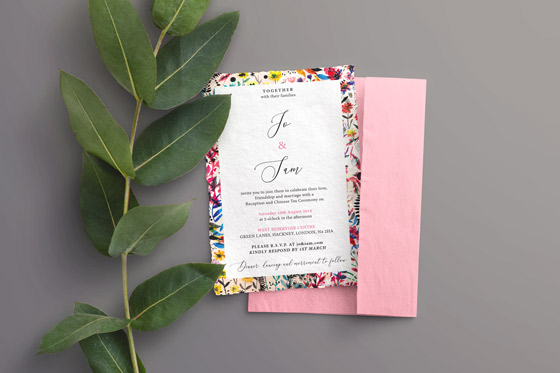
I’ve been waiting for so long to write up this post and, well, the moment you’ve all been waiting for folks: the WEDDING INVITE REVEAL! Yes, the day has finally come where I can show you my wedding invites- I’m super excited right now!

It’s been one of the best pieces of works I’ve done, not only because it’s personal and right from the heart, but I think it’s every designers dream to design their own wedding invites. The whole process took me over a month and a half from start to finish- I started it way back at the start of August of last year and kept on editing it over the past couple of months, but had to stop myself from doing anymore to it other I could’ve gone on and on!

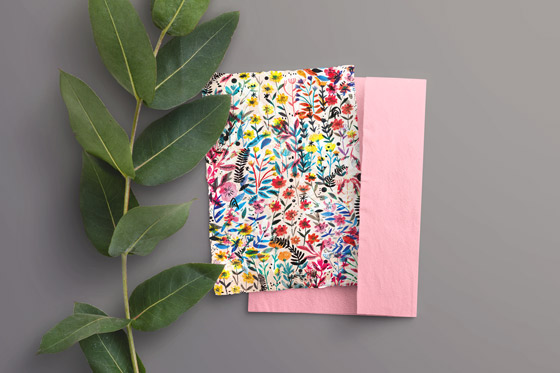
The floral design for the background started off as a couple of small paintings and I then digitally edited the final image in Photoshop. I used inspiration from our travels to various National Trust places last summer and I was inspired by all the seasonal flowers during our time at these places.

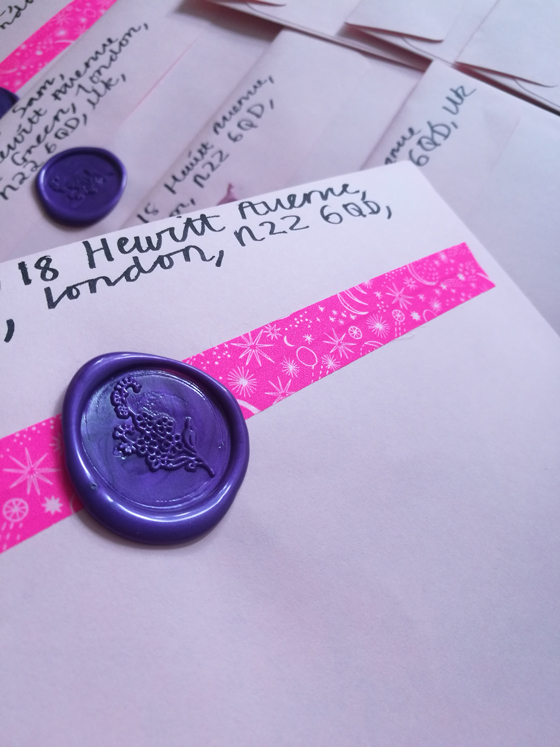
For the insides of the envelopes I continued with the floral theme and designed an insert, as well as incorporating a floral motif for the wax seals.

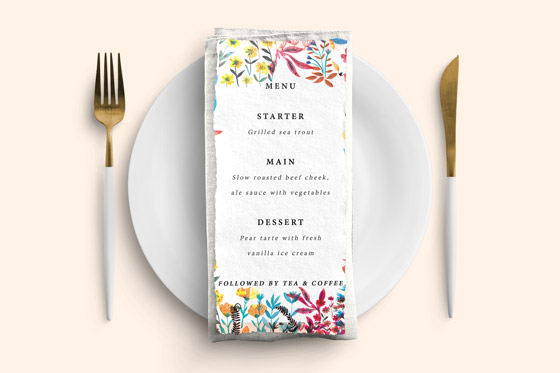
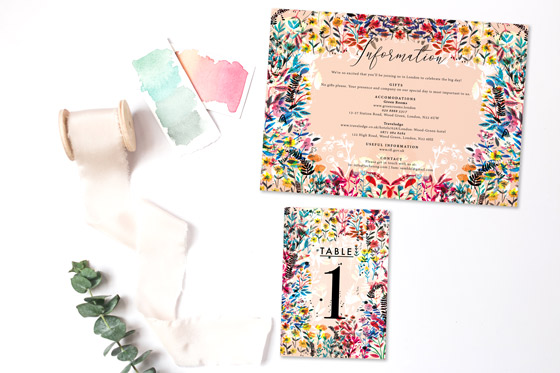
Once I had the design I can use it on other things such as the menus, table seatings, table numbers etc. I wanted the text to be quite clear, bold and clean looking so I used a combination of fonts such as Futura, a hand written font for our names and a modern Times font to compliment the overall design.

My Tips for Designing your own Wedding Invites

  • Have fun with it!
  • Be creative with your design. Some people choose to opt for an email as printing costs can be quite pricey- go with what you want to do and whatever you feel happy with.
  • Decide what elements you want (e.g. text) and keep it simple.
  • Look at what colours go together and choose a couple, too much can look way too busy.
  • I looked online on how to write the intro but you can obviously make your own one up depending on how you want it to sound.
  • Look around for design inspiration, ask a friend to help you go over it i.e. spelling mistakes etc. as sometimes it’s quite hard to pick it up when you’ve spent hours on the screen looking at the same thing!
  • When deciding on the paper I want for something that wasn’t too heavy but still had some texture to it. Minted and Printed both give free samples so you can look at what paper they offer. There are of course lots of other printing companies that offer paper samples, just look around or ask around.
  • I bought the envelopes separately as I wanted to have a different colour as to what the printers were offering. Go with what you feel is best.

That’s it for now and I hope you’ve enjoyed reading this. It’s not long now until the wedding- about six months to go now!

Happy Tuesday and enjoy the rest of the week.

Hello lovely readers! This is going to be a very quick post about how to make paper flowers. I’ll be going through step-by-step on how to put together paper flowers for all your spesh occasions. There are loads of books and online tutorials on how to put together paper flowers (thank you Pinterest as always); I won’t go into detail about using different types of paper etc. as I feel that it’s up to you to go and have some fun and experiment with this part of the process.

I’ve been making paper flowers since the start of October as my plan for the wedding reception was to have a mixture of paper flowers on the tables and a BIIIIIGGGG flower installation hanging across the beams. I’m getting pretty adventurous here and I’m not sure if I’m jumping the gun, like, but I thought I’d make as many as I can from now until the wedding and see what happens really!

In my previous post I wrote on how to make paper flowers using a die-cutting machine and this post kind of follows on from that. For this next step you’ll already need some paper flowers ready so that you can make the stem for it and add any other details you want to it.

Alrighty, so let’s get making paper flowers folks!

What You’ll Need

  • Paper flowers and leaves at hand
  • Floral tape
  • Pliers
  • Floral wires (available from most craft shops)
  • Cutting mat
  • Glue gun and loads of glue sticks!
  1. Depending on how high you want your flower I’d use one piece of wire per flower. If you want to make smaller ones then cut the piece of wire using pliers.
  2. Wrap the wire using the floral tape from top to bottom, stretching it and twisting it as you go. Remember to press into the tape as you make your way down it. The easiest and fastest way is to literally spin the wire around the tape and that way you cover all of the wire.
  3. If you want to add stems to it repeat steps one and two; to add different heights to the flower place the stems randomly or as naturally as possible.
  4. Have cut out green leaves for the bottom of your flower and make a hole in the middle of it by pushing through the floral wire.
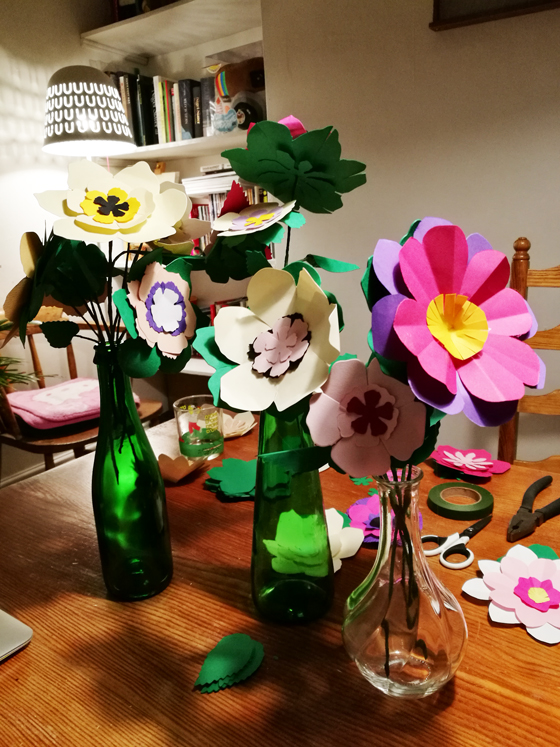
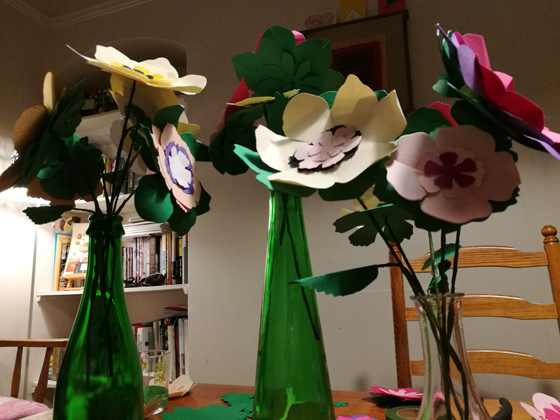
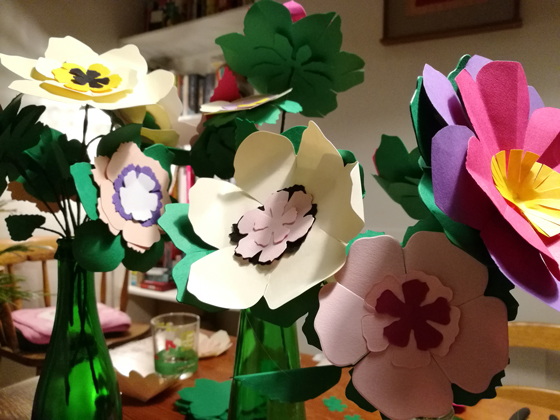
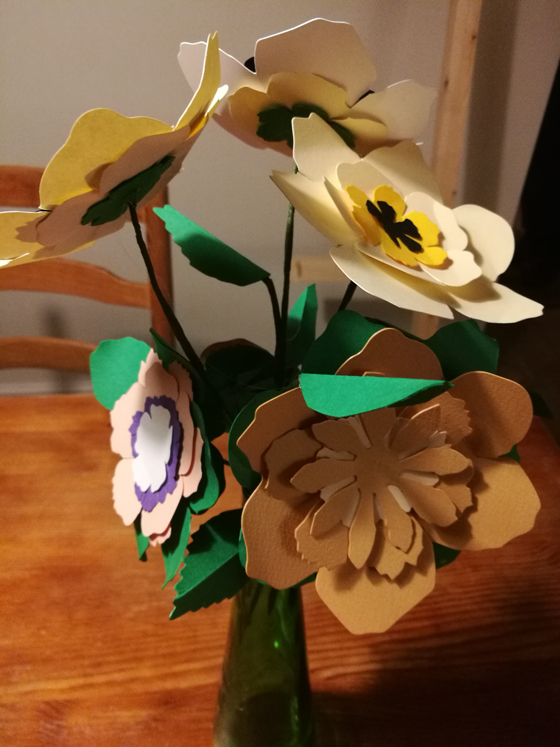
  5. The next step is to assemble everything together. As you can see from the photos I’ve used two pieces of green leaves which holds the flowers to add texture to it.
  6. Get your glue gun ready!
  7. Glue together all the pieces together, pressing them together firmly as you go. For the last part of the green leaves (BEFORE you stick on your flower), bend the wire so that it secures and holds the green leaves.
  8. Add more glue to the top part and press together your flower.
  9. Keep going and add more leaves to your flower(s).
You can see from this photo that I’ve added green leaves to the bottom of the flower heads. This holds the wire and the flower head together (step 7 and 8).

I’ve found that using different shaped leaves and flowers can really make the whole thing stand out. There are kits online where you can easily assemble them together, however, this is so much fun and the fact that once you get into the rhythm of it, you can make a few in one go.

Like I said, there are lots of books on how to make different types of paper flowers (e.g. crepe paper flowers)- I’m pretty much going to stick with this style as it’s easier for me to make one big batch in one go. We are hoping to give them away at the end of the evening, which will be a rather lovely gift for our guests as we’re not doing wedding favours.

Get crafty folks and enjoy the rest of your weekend!

GOODBYE JANUARY! January sure did drag on for a while, right? Not sure if it was the shorter days and the lack of light but at some points in the month I was feeling up and down like a see-saw. Or even post-blue Christmas holiday feels certainly lingered on; seeing my friends and family over the Christmas period made me feel guilty for not being closer to them. I suppose it’s one of the downsides of being far apart from your folks, I mean, I can jump on the train and see them. But that means spending ‘X’ amount on train fares and only having a short amount of time to seeing everyone *sighs*.

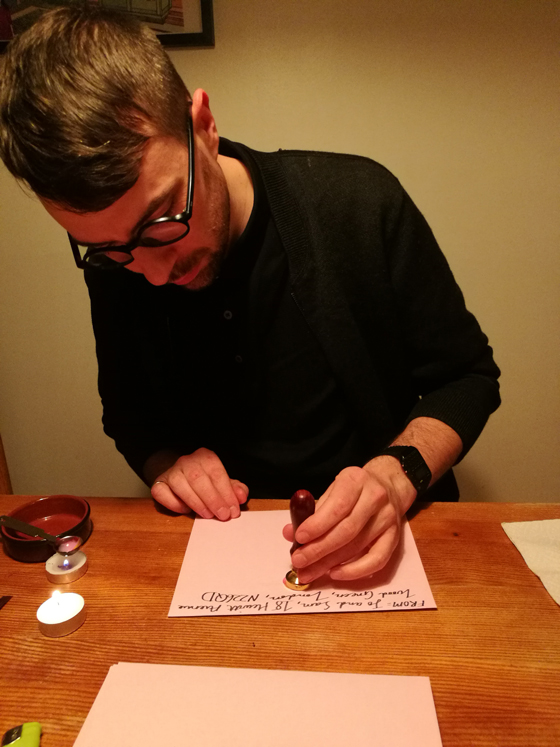
The wedding prep has been a rather nice distraction from all of this and I can say that although I haven’t done as much art as I’d like to, I’ve picked up paper craft pretty quickly and I love looking on Pinterest for inspiration and ideas. In this post I’ll be writing about wax seal stamps and how to make them for letters and envelopes. Firstly, I’m going to be honest and say that I’m not a pro at this; all of these skills I’ve picked up are from YouTube and Pinterest plus trial and error! I was never intending on making wax seals for our invites but Sam’s mum sent me some photos of some (probs Pinterest if I remember correctly) and since then I was completely hooked onto the idea of it- there’s something about wax seals that makes it so much more personal since no two seals are the same. You just need time, patience and an extra pair of hands if you’ve got lots of envelopes to seal!

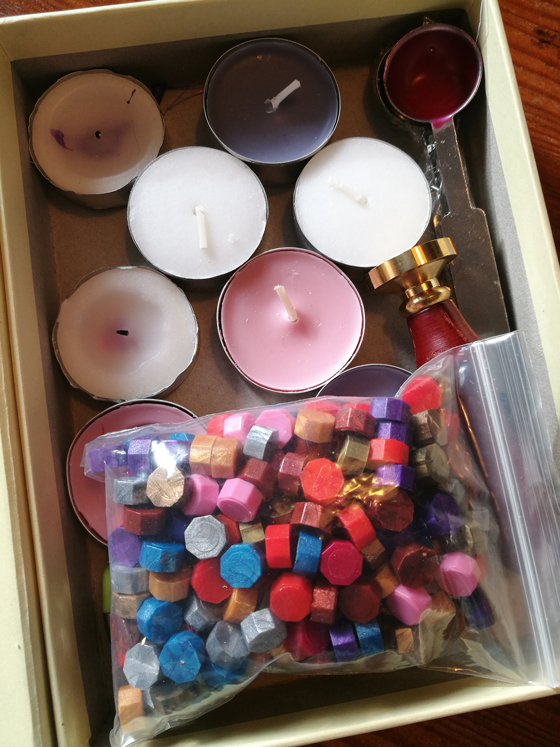
I bought my stamp from Etsy and it was reasonably priced for what you get: one stamp, three wax sticks, two tea lights and a metal spoon. There are loads of different designs online but if you want a custom one, then you’d need to contact the seller/maker with what you want. I wanted a simple flower design to match the invites: nothing fussy or over complicated.

What You’ll Need

  • One stamp
  • Tea lights (good quality ones though)
  • Wax sticks or pellets like the one in the photo
  • Spoon
  • Lighter
  • Damp cloth
  • A small dish so you prop your spoon whilst you’re melting the wax

I found that using the wax pellets were way more easier than using the wax sticks. The wax sticks can be quite fiddly to melt especially when you get towards the end of it and it turns into a stubby, little mess! I tried cutting it into pieces, which I failed as the stick was pretty hard to cut through. The main advantage of using the wax pellets is that you can mix different ones together much easily to get a marble-type effect. You can still do the same thing with wax sticks but it’s just a tad more faffing around with the wax sticks. Just take care when you’re doing this though especially if you’ve got children, cats, dogs etc. around your workspace- soz if I sound completely patronising but safety is always first though!!!!

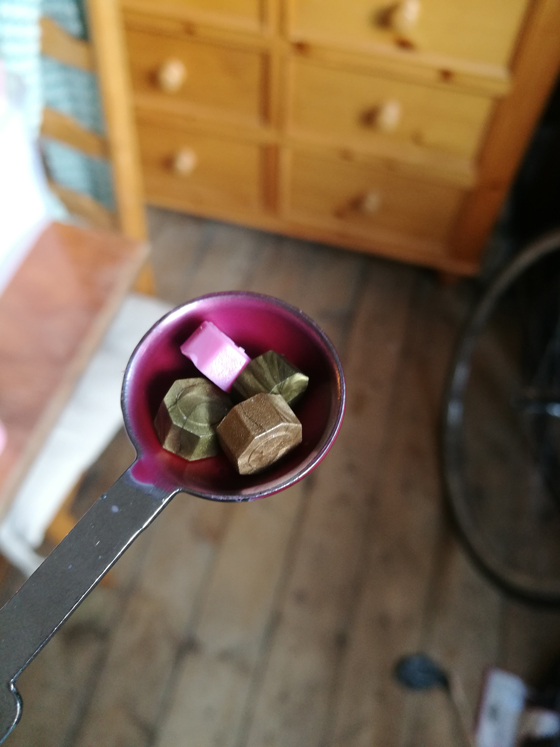
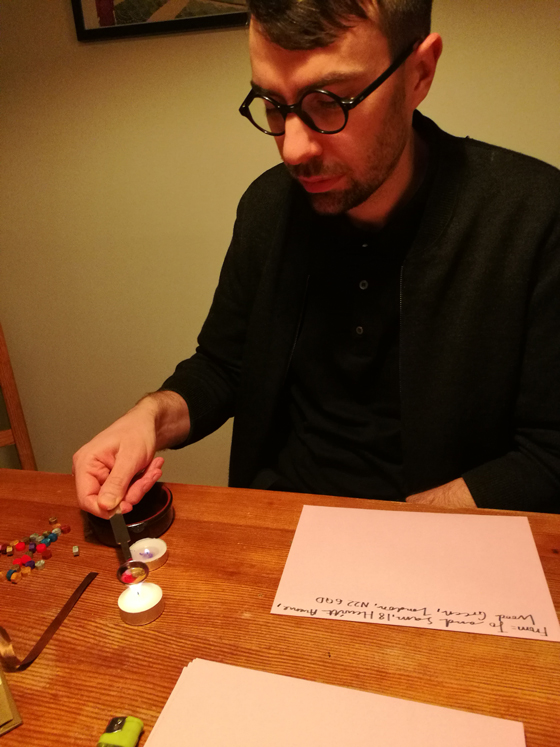
  1. Heat up the metal spoon over the tea light for a couple of minutes and place the wax pellet into the spoon.

You’ll know when the wax is ready if you give it a bit of a swish. Don’t worry, the wax comes out pretty slowly as I thought that the wax would be super runny! Also, don’t fill it up too much otherwise the wax will seep out.

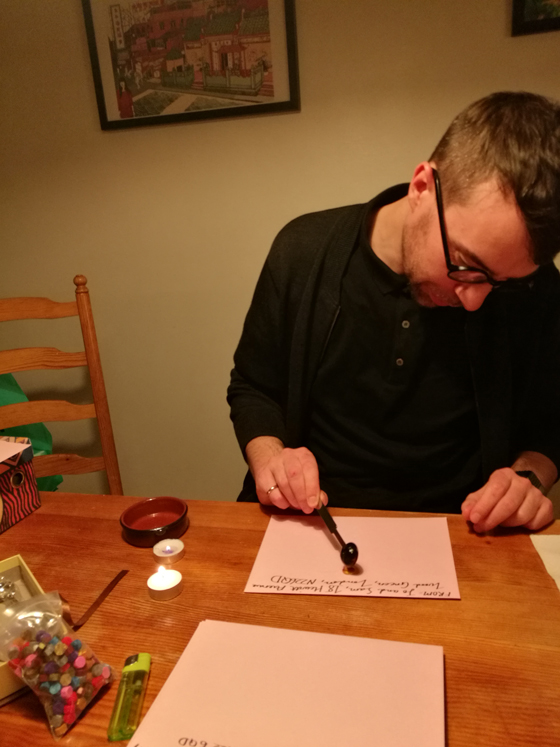
2. Once the wax is ready pour it into the centre of the envelope in a circular motion.

3. Now place the stamp over the wax for a couple of seconds, slight pressure to the stamp but not too much though.

4. Done! Keep going with different types of colour for a marble effect and remember to put the tea light out when you’ve finished. Give the spoon a wipe with a damp cloth to remove any residues.

You can play around with different colour waxes for different effects- the possibilities are limitless (depending on what your colour theme is).

That’s all for now and happy crafting everyone! I’d love to see what your seals look like and any tips/hints please do post them in the comments section.

This is not a sponsored post nor am I affiliated with any advertising/promotional deals.

Hello folks! I’m going to start a series of DIY guides for wedding-related craft projects. As you may know, Pinterest is such a wonderful source of inspiration and I’m forever looking at posts for ideas for our wedding. I started a board years ago and it’s been such a great tool for art and craft projects. However, sometimes I get way too carried away and go off on a tangent for several hours!

My main task for the wedding reception is that I wanted to create something quite opulent, flower-inspired since my invites are along that theme, so I’ve decided to make paper flowers as a start and from there use them to make a chandelier as well as garlands. I started off cutting out circles and then making them 3D shape so that they can sit nicely once they’re all bunched together. My only issue with this method is that it does takes ages and you need to have patience/music in the background to keep you going. I also found that it’s very difficult to get the flowers all looking the same, not like I wanted them to, but I was unable to to anything intricate due to the time factor.

I came across a die-cutter thanks to my aunt, who has kindly let me borrow hers, and I’ve honestly not looked back since I’ve been using it! It’s saved me so much time and I’ve been churning loads of flowers out like a pro! I think there are numerous brands of die-cutters but I’ve been using one called the Sizzix. It’s pretty straight forward to use and so far I’ve not encountered any problems with it. There are loads of options of different dies too so I’ll buy a few more so that there’s variations in the types of flowers. For me, it feels really durable and the die cutter has some weight to it- so it feels super sturdy when you’re holding it.

What You’ll Need

  • Die-cutting machine (you can by them online or in craft shops)
  • Paper (lots of it!)
  • Pencil
  • Heavy-duty ruler
  • Scalpel or scissors
  • Cutting mat
  • Glue (I like to use super glue)
  1. Prep your paper so that it sits nicely between the plastic board and the die. You’ll want to cut it so that it can fit through the die cutter- so I tend to measure up all my paper and cut them to the right size.

2. When your paper is sandwiched between the plastic boards and the die (the foam side facing upwards like in the photo above), you’ll want to leave at least a 1cm gap when you’re feeding it through. Gently push it through and start to turn the handle. At this point, you’ll be able to feel the rollers grip onto the plastic boards.

3. Done! Well almost. I usually keep going at this point, mixing up the papers until I have enough to keep me going.

4. Once you’ve cut out all your layers you’ll want to start layering up the bits of paper. I fold the petals inwards so that they’re 3D-looking and using different types of paper/card will give you different effects.

Note: try using plain paper and washing it down with light water colours or spray paint to get different effects.

And that’s pretty much it. I’ve found that the more you try out different types of paper, the variations are limitless. There are lots of helpful online tutorials if you get stuck but personally once you start using it’s really so easy to use.

I hope I’ve inspired you to create your own paper flowers; even with or without the dit cutter you can still make simple paper flowers even it’s cutting out the petals and arranging them on a circular paper disc, continuing to layer them up as you go.

Happy crafting folks!